How to Install a Ceiling Light Fixture from Scratch

Introduction
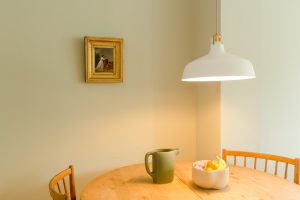
Installing a ceiling light fixture from scratch can seem like a daunting task, but with the right tools and some basic knowledge, it can be a straightforward and rewarding DIY project. In this article, we will guide you through the necessary steps to install a new ceiling light fixture from scratch.
Materials Required
Before you begin, gather the following materials:
- Wire stripper
- Wire connector
- Circuit tester or multimeter
- Screwdriver
- Wire nuts
- Electrical box
- Metal bracket
- Lamp cord with plug
- Ceiling light fixture
Step 1: Turn Off the Power
To ensure your safety, always turn off the power to the circuit you will be working on. Use a circuit tester or multimeter to verify that there is no voltage at the relevant electrical box.
Step 2: Install the Electrical Box
Once you have turned off the power, install an electrical box at the desired location for your ceiling light fixture. Make sure the electrical box is rated for the weight of the fixture you will be installing.
Step 3: Attach the Metal Bracket
Attach the metal bracket that came with your new ceiling light fixture to the electrical box using screws.
Step 4: Connect the Wires
Connect the wires from the ceiling to the wires on the new ceiling light fixture. In most cases, you will need to connect the black or red wire from the ceiling to the black wire from the fixture, the white wire from the ceiling to the white wire from the fixture, and the green or bare wire from the ceiling to the green or bare wire from the fixture.
Tip: Use Wire Connectors
Use wire connectors to securely attach the wires together.
Step 5: Install the Light Bulbs
Install the light bulbs into the light fixture according to the manufacturer’s instructions.
Step 6: Attach the Cover Plate
Attach the cover plate to the light fixture using screws.
Step 7: Insert the Lamp Cord
Insert the lamp cord with plug into the center hole at the bottom of the light fixture.
Tip: Strip the Ends
Strip the ends of the cord wire before attaching it to the fixture.
Step 8: Connect the Cord Wires
Connect the wires from the lamp cord to the wires on the light fixture. Typically, you will connect the black cord wire to the black wire on the fixture, and the white cord wire to the white wire on the fixture.
Tip: Use Wire Nuts
Use wire nuts to securely attach the wires together.
Step 9: Attach the Fixture
Attach the fixture to the metal bracket using screws.
Step 10: Test the Fixture
Turn the power back on and test the fixture to make sure it is working properly. If not, turn off the power again and check your connections.